Water for Life 25
How TO MAKE A COVER SLAB
Once a well has been lined, the next stage of protection is fitting a concrete cover
slab. The cover helps prevent polluted wastewater and other objects from falling into
the well. It also makes the well safer for children and provides a clean resting place for
buckets as people collect water.
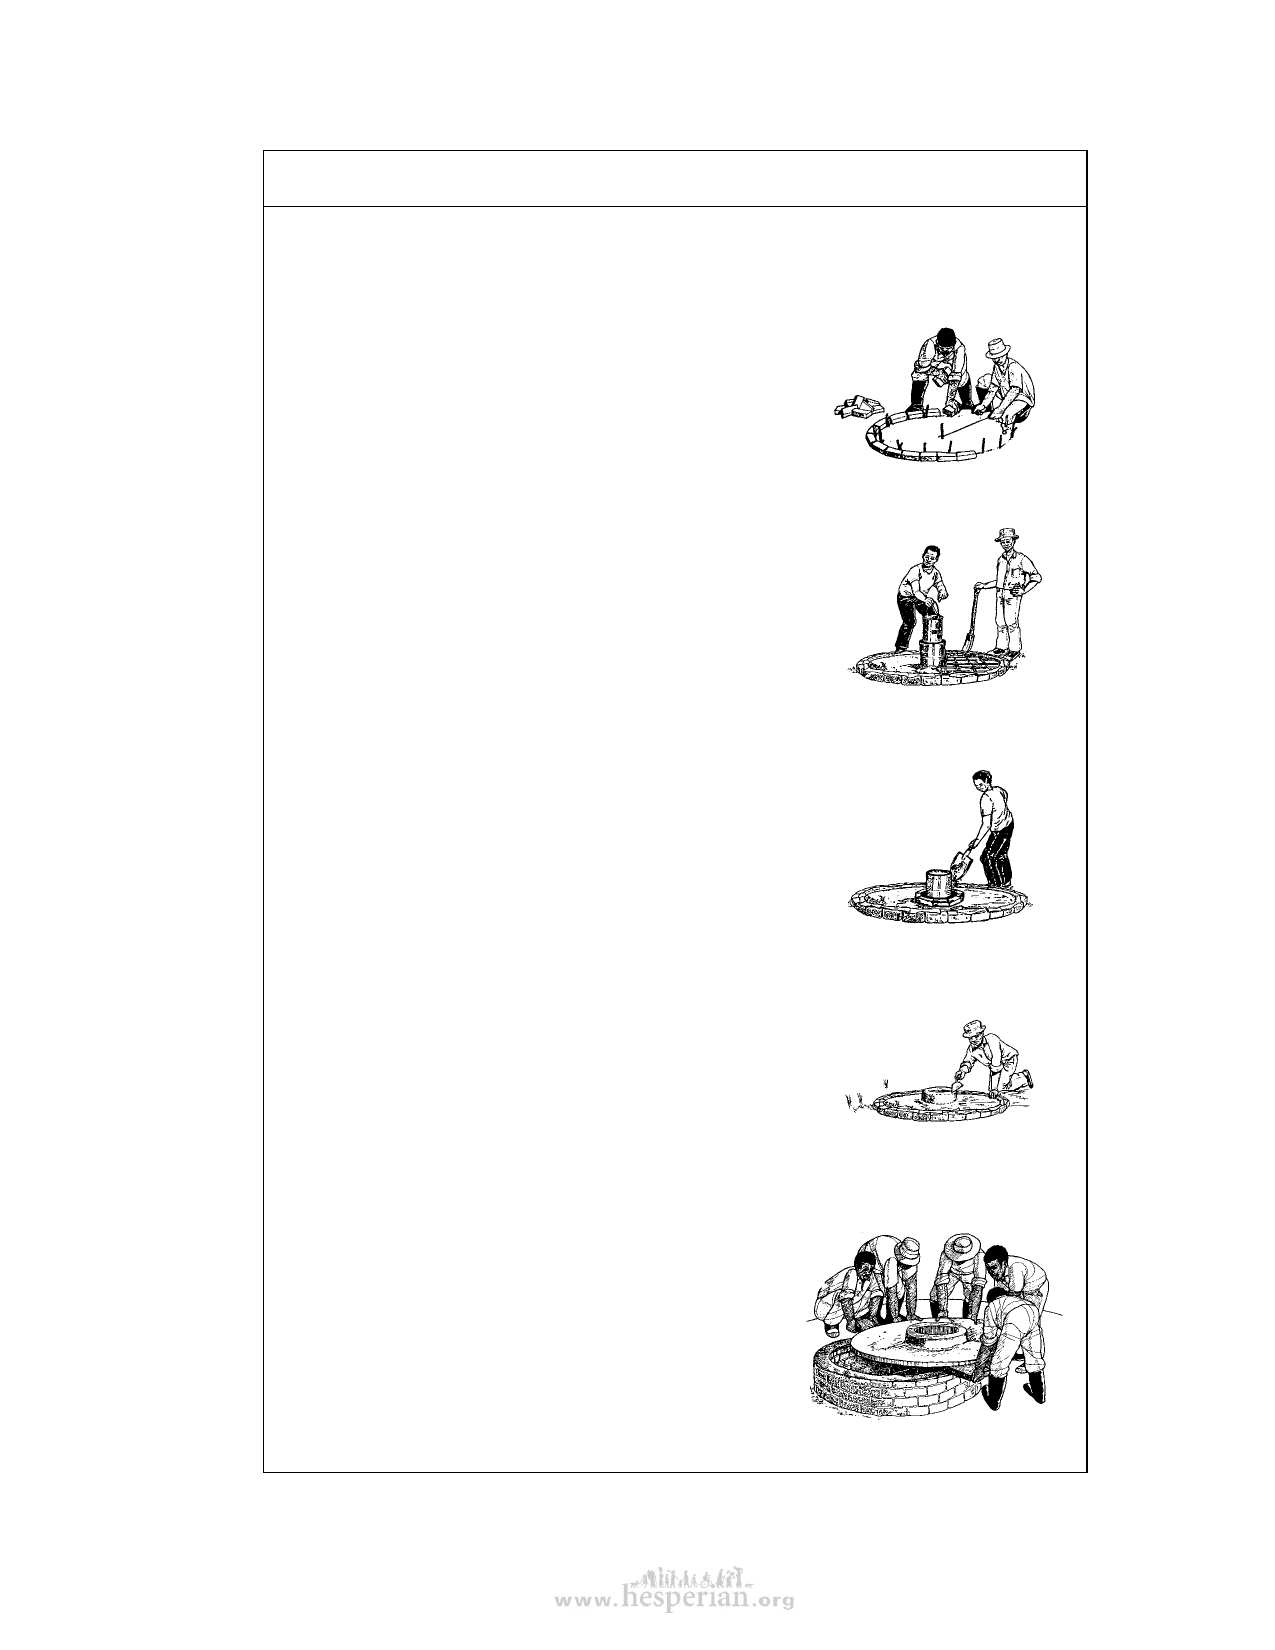
The cover should fit neatly over the upper well lining. Clear a
flat place to pour a concrete slab and mark out a circle the
size of the cover slab to fit the well. Place a ring of bricks
around the marked circle. This ring is the slab mold.
Make a mold for the slab
Leave a hole in the slab for a bucket to pass through or a
pump to be fitted. The size of the hole depends on the kind
of pump or bucket used, but generally the hole should be
large enough for a 10 liter bucket. A can large enough for a
bucket to pass through can be used to form the hole.
Place reinforcing wire (3 millimeter) within the slab mold to
form a grid with spaces 10 centimeters apart.
Place reinforcing wire and
a mold for the hole
Remove the reinforcing wire grid, and make a concrete mix
of 3 parts gravel, 2 parts river sand, and 1 part cement.
If stones are not available, use 4 parts river sand and I
part cement. Pour concrete in the mold, half way to the
top. Place the wire grid on top of the wet concrete. Add the
remaining concrete and level with a piece of wood.
Let the slab cure for 1 hour. Remove the bucket hole mold,
and fill the central hole with wet sand. Replace the mold
on top of the sand and place a ring of bricks around it,
leaving 75 millimeters of space between the bricks and the
mold. Fill the space between the bricks and the mold with
concrete, and let it cure for an hour. After an hour, remove
the bricks and the tin mold and shape the protective collar.
For the collar to give the best protection, a tin cover should
fit snugly over it.
Pour the concrete slab and
form the protective collar
Shape the protective collar
Let the completed slab cure for at least 3 days, keeping
it wet the entire time. After it has dried for 7 days or so,
place 4 blocks of wood 1 or 2 inches high under the 4
sides of the slab to raise it off the ground. Then dance on
it! A well-made slab will not break even with several people
dancing on it. Place a bed of cement mortar on the lip of
the well lining and carefully set the well cover in place. Keep
it covered or shaded for 3 days to prevent the mortar from
cracking in the sun.
Set the cured well cover in place