Candlemaking
Practical Action
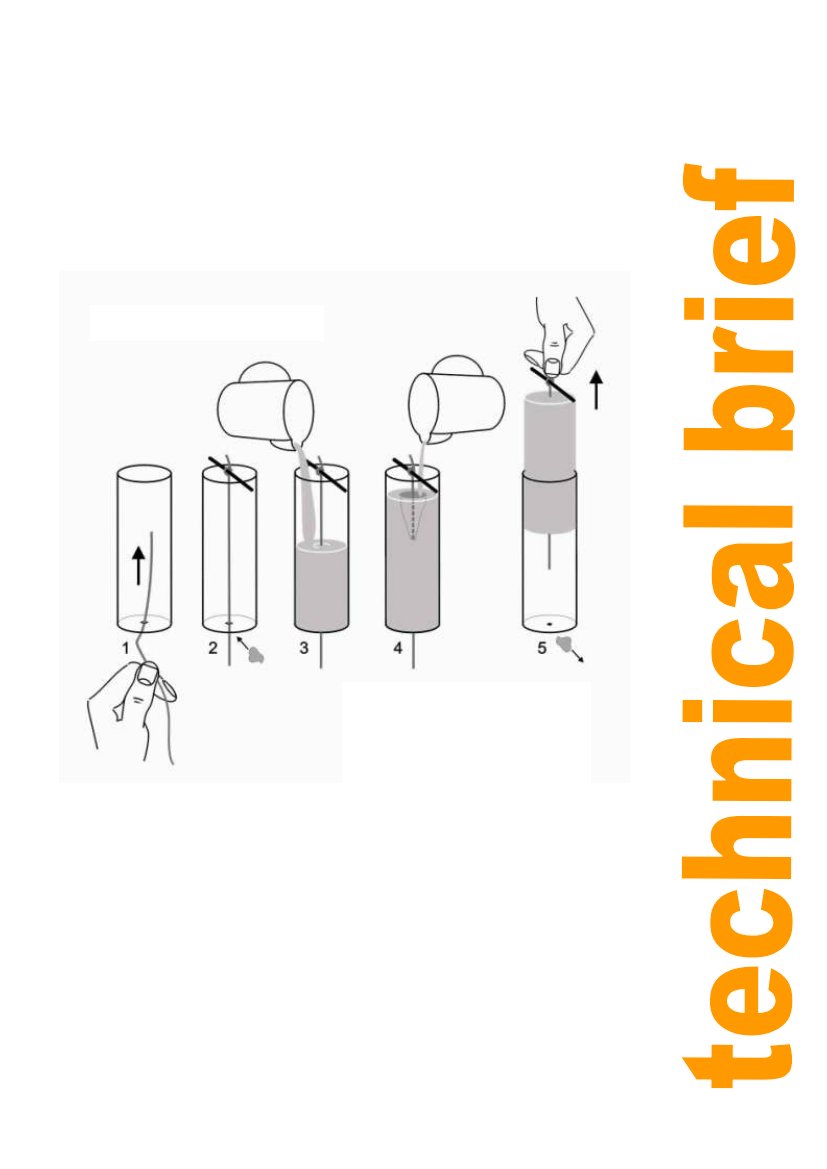
process. As the wax cools it contracts and shrink cavities will appear. These cavities should be
opened with a sharp knife to allow filling with more liquid wax. Do not fill beyond the original wax
level. Do not try to remove the candle from the mould until you are sure that it is fully hardened.
To de-mould the candle, remove the sealant and whilst gripping the wick at the bottom of the
candle, pull the candle from the mould. The candle should pull out of the mould easily, however if
it is sticking it can be placed in a refrigerator or cold water for a short period of sudden shrinkage.
If there is still a problem with de-moulding, the candle can be melted out with hot water, but this
will probably spoil the surface finish.
Figure 7: Moulding candles
1. Thread wick
2. Tie wick and seal hole
3. Pour wax and allow to cool
4. Fill shrinkage cavities
5. Remove sealant and de-mould
Equipment
In general, candle moulds come in two varieties; rigid and flexible. Rigid moulds are made from
materials such as metal, glass, and plastic whereas flexible moulds are made from rubber or PVC.
Flexible moulds can be used to produce irregular-shaped candles and also allow undercuts. Moulds
are available for purchase in a wide range of shapes and sizes, but they can also be designed and
handmade by the candlemaker. Remember that the candle will be an exact replica of the internal
shape and texture of the mould.
Colours and effects
Candles can be moulded in any colour or can be poured in several different coloured layers to
make horizontally striped candles. Experimenting with tilting the mould between multi-coloured
layers can produce angled striped effects. Other ideas can be explored such as filling the mould
with chunks of solid wax and then filling with liquid wax, or by adding small amounts of solid dye
before the wax has hardened. Candles with multiple wicks and a variety of scents are also options.
8