164 Where There Is No Dentist 2012
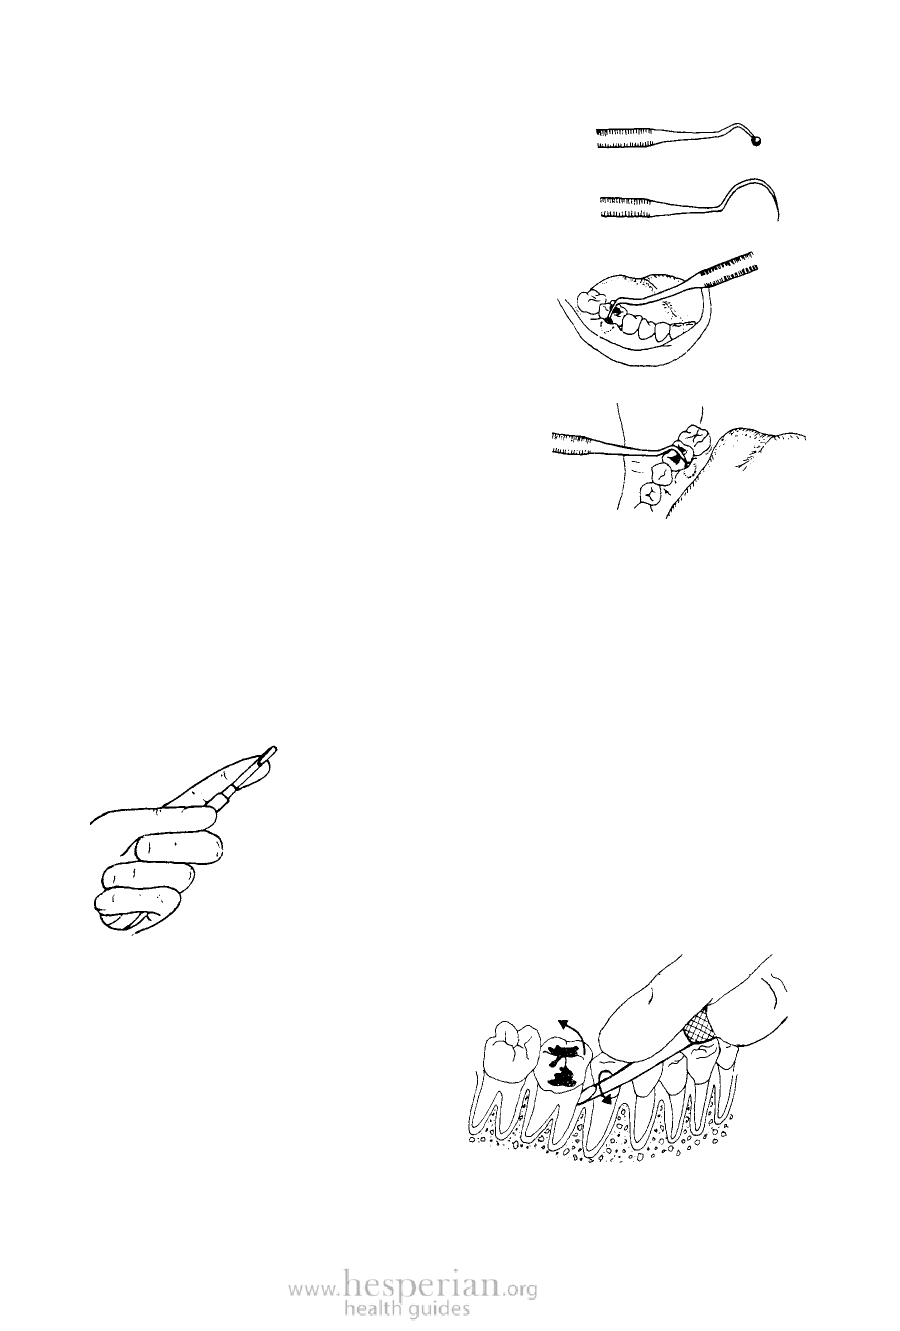
3. S eparate the gum from the tooth.
The gum is attached to the tooth inside
the gum pocket. Separate the gum and
tooth before you take out the tooth. If
you do not, the gum may tear when
the tooth comes out. Torn gums bleed
more and take longer to heal.
Use this
or this
Slide the end of the instrument along the
side of the tooth into the gum pocket. At the
deepest part of the pocket, you can feel the
place where the gum attaches to the tooth.
Front Side
Push the instrument between this
attached part and the tooth. Then
separate the tooth from the gum by
moving the instrument back and forth.
Do this on both the cheek side (outside)
and the tongue side (inside) of the tooth.
Back Side
The attached gum is strong, but it is also thin. Control
your instrument carefully so that it only cuts through the part that
is attached to the tooth. Do not go any deeper.
4. L oosen the tooth. A loose tooth is less likely to break when you take
it out. Before you take out a strong tooth, always loosen it first with a
straight elevator.
Caution: if you do not use it properly, a straight
elevator can cause more harm than good.
It is important to hold a straight elevator properly.
Place your first finger against the next tooth while you
turn the handle. This will control it.
Remember that the sharp blade can slip and hurt the
gums or tongue.
The blade goes between the bad tooth and
the good one in front of it. Put the
curved face of the blade against
the tooth you are removing.
Slide the blade down the side
of the tooth, as far as possible
under the gum.
Turn the handle so that the
blade moves the top of the
bad tooth backward.
Put pressure on the bone, not the tooth
beside it. Do not loosen the good tooth!