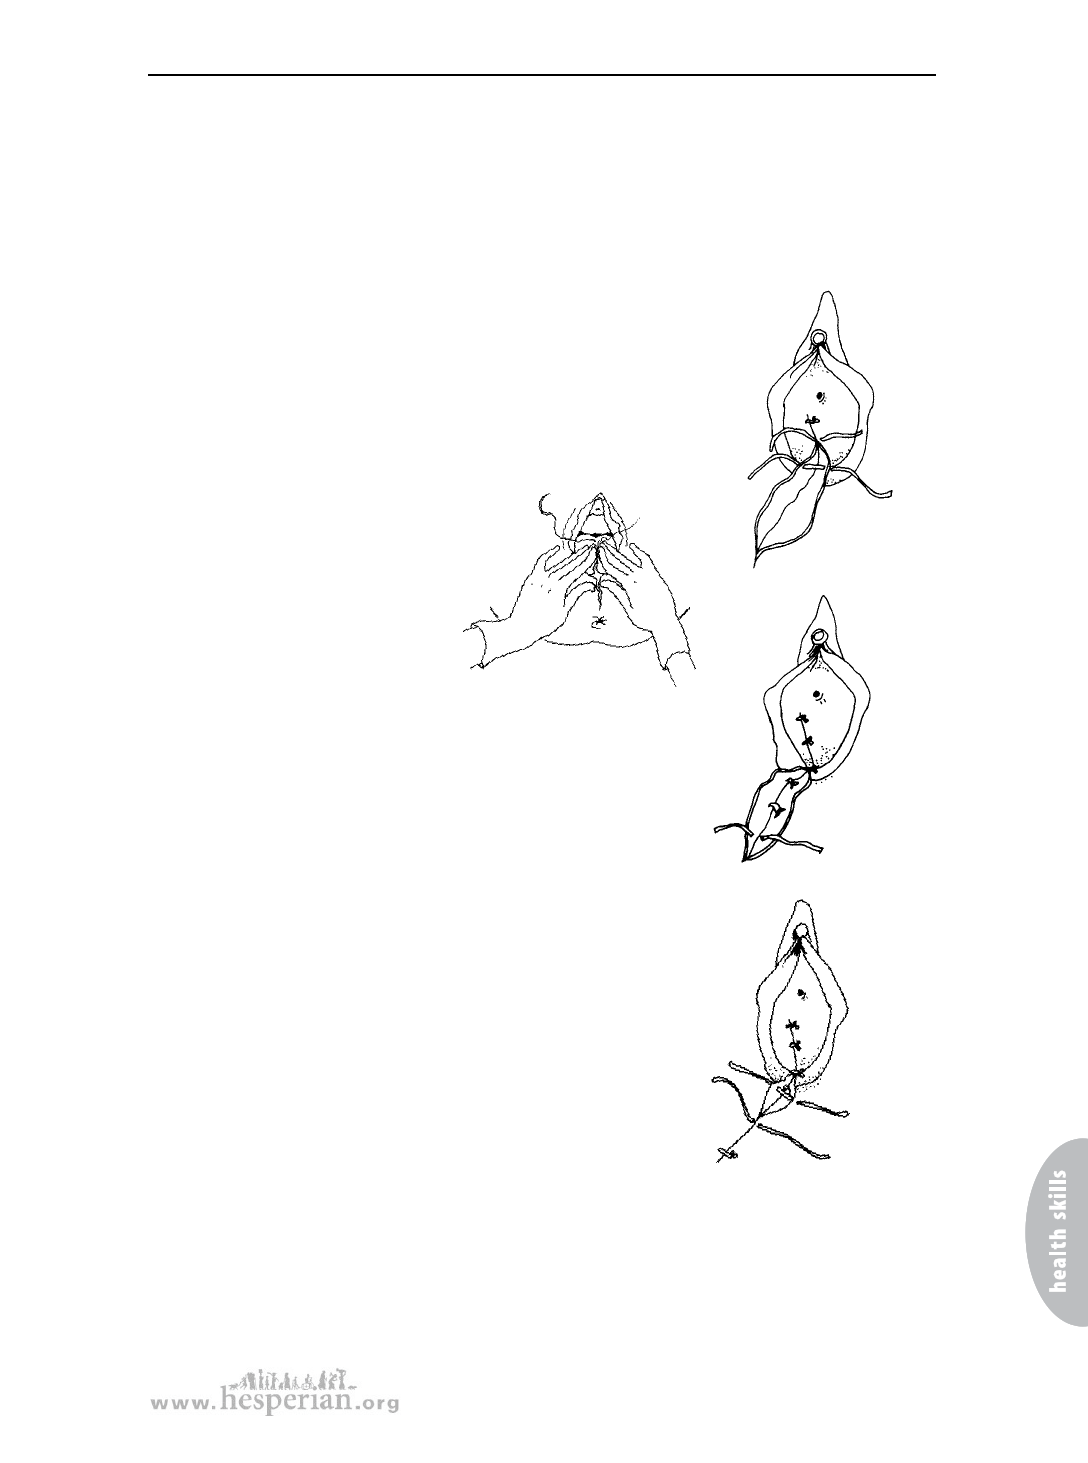
Sewing a tear or episiotomy
Astep-by-step way to sew a tear or episiotomy
1. If you have it, put sterile gauze in the vagina above the tear. It helps to stop
blood from leaking and getting in your way. Remove the gauze when you are
finished sewing.
2. The inside of the vagina is made of a kind of tissue called vaginal mucosa.
Under the mucosa is muscle which is more red and tough. It is
important to sew mucosa to mucosa, and muscle to muscle.
3. Using chromic gut or Vicryl suture, put the first stitch
above the inside tip of the tear in the vagina and tie a
4-layer square knot. Clip the stitch with sterile scissors.
4. Continue to make
interrupted stitches as
shown, through the length
of the vagina.
From time to time, push all
the pieces of the tear
together to make sure things
are going together nicely.
5. If the tear goes into the muscle, use interrupted
stitches to sew the inner muscle layer together.
Use as few stitches as possible, just enough to hold it
together. Usually 2 or 3 will do. With each
interrupted stitch, tie a 4-layer knot and clip
the ends with sterile scissors.
6. Now close the skin of the perineum over the muscle,
using the same type of interrupted stitches and
4-layer knots.
Clip the ends with sterile scissors. Be sure the stitches
that close the muscle are covered by the skin.
7. Before you finish, gently put a finger into the mother’s rectum to be sure that
no stitches went all the way through. If you feel a stitch in the rectum, you must
take her stitches out and do them over again! Be careful not to get any stool
on her wound.
8. Throw away (or sterilize) your gloves and wash your hands well.
A Book for Midwives (2010)
365