540 chapter 58
Different materials and ways to make braces
As we discussed in Chapter 56, an ideal brace should:
• serve its purpose well (help the child walk
or function better)
• be comfortable
• be lightweight yet strong
• be as attractive as possible
• be easy to put on and take off
• do no harm
• be low cost
• be easy and quick to make with local tools
and limited skills
• use local or easily available materials
• be easy to repair and adjust as the child
grows or develops
• be long lasting
Unfortunately, no brace will meet all these requirements. As much as possible,
try to put the child’s needs first.
In this chapter we give ideas for making different braces using various materials.
When deciding how to make a brace, carefully evaluate both the child’s needs and
the available resources (see Chapter 56).
Sometimes it
is wise to start
with a simple
low-cost
temporary brace
or splint to
see how well
it works and
what the
problems are.
Keep old and outgrown
braces for testing on
new children before
final braces are made.
But take care not to
discourage the child
by making him use
braces that do not
fit him well.
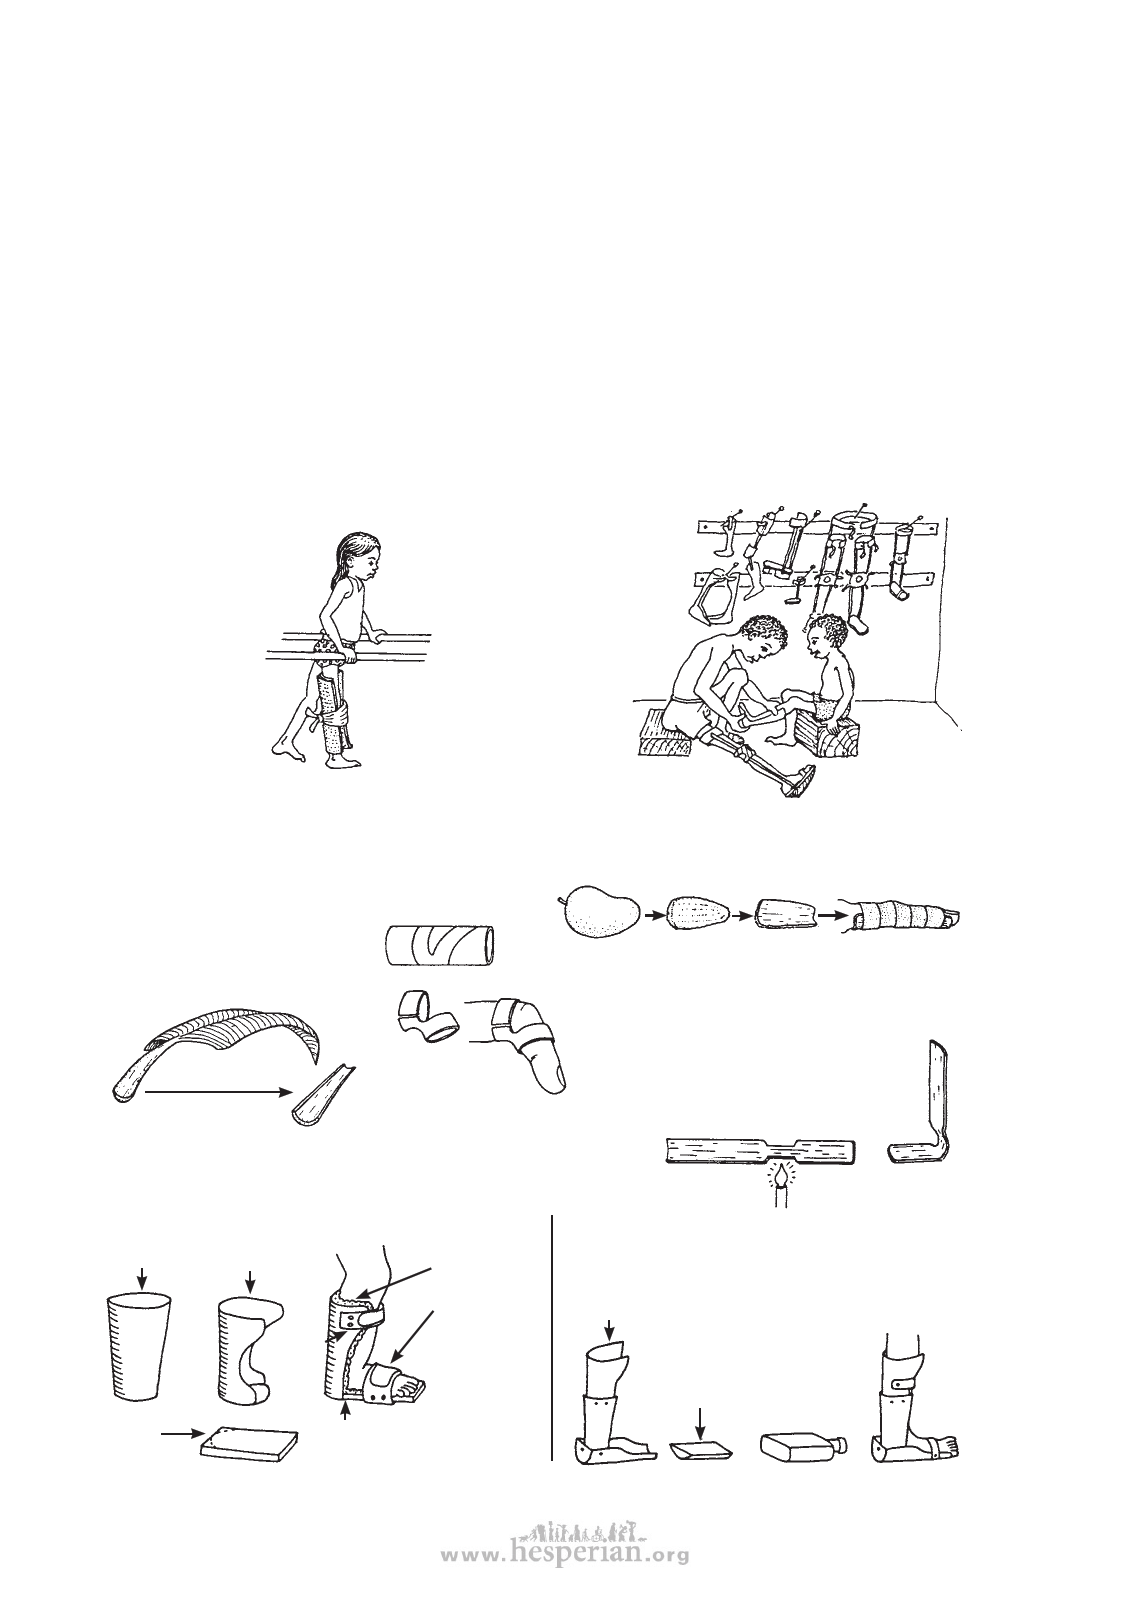
Examples of very simple, low-cost braces and splints:
A temporary leg splint
of cardboard, folded
paper, or the thick
curved stem of a
dried banana leaf,
or palm leaf.
Aluminum tube
finger splint
Plastic cup ankle braces for night or temporary use
on a small child.
For a small baby:
plastic cup Cut like this
padding
piece
of wood
rivets
straps of
leather,
canvas, or
Velcro, if
possible
Rivet or nail
wood to cup.
Mango seed finger splint
Remove the woody coat of a mango seed,
and wrap the coat firmly onto the finger.
It will dry into a firm splint. To change its
shape, first soak it in water.
Bamboo ankle splint
A piece of seasoned bamboo
can be heated and bent.
For a child:
3 cups cut
and riveted
together
Make a flat
inner sole
out of cloth
or wood.
Or cut the
foot piece
from a flat
plastic
bottle.
Add straps
to fasten
the brace
around leg.
Disabled village Children