552 chapter 58
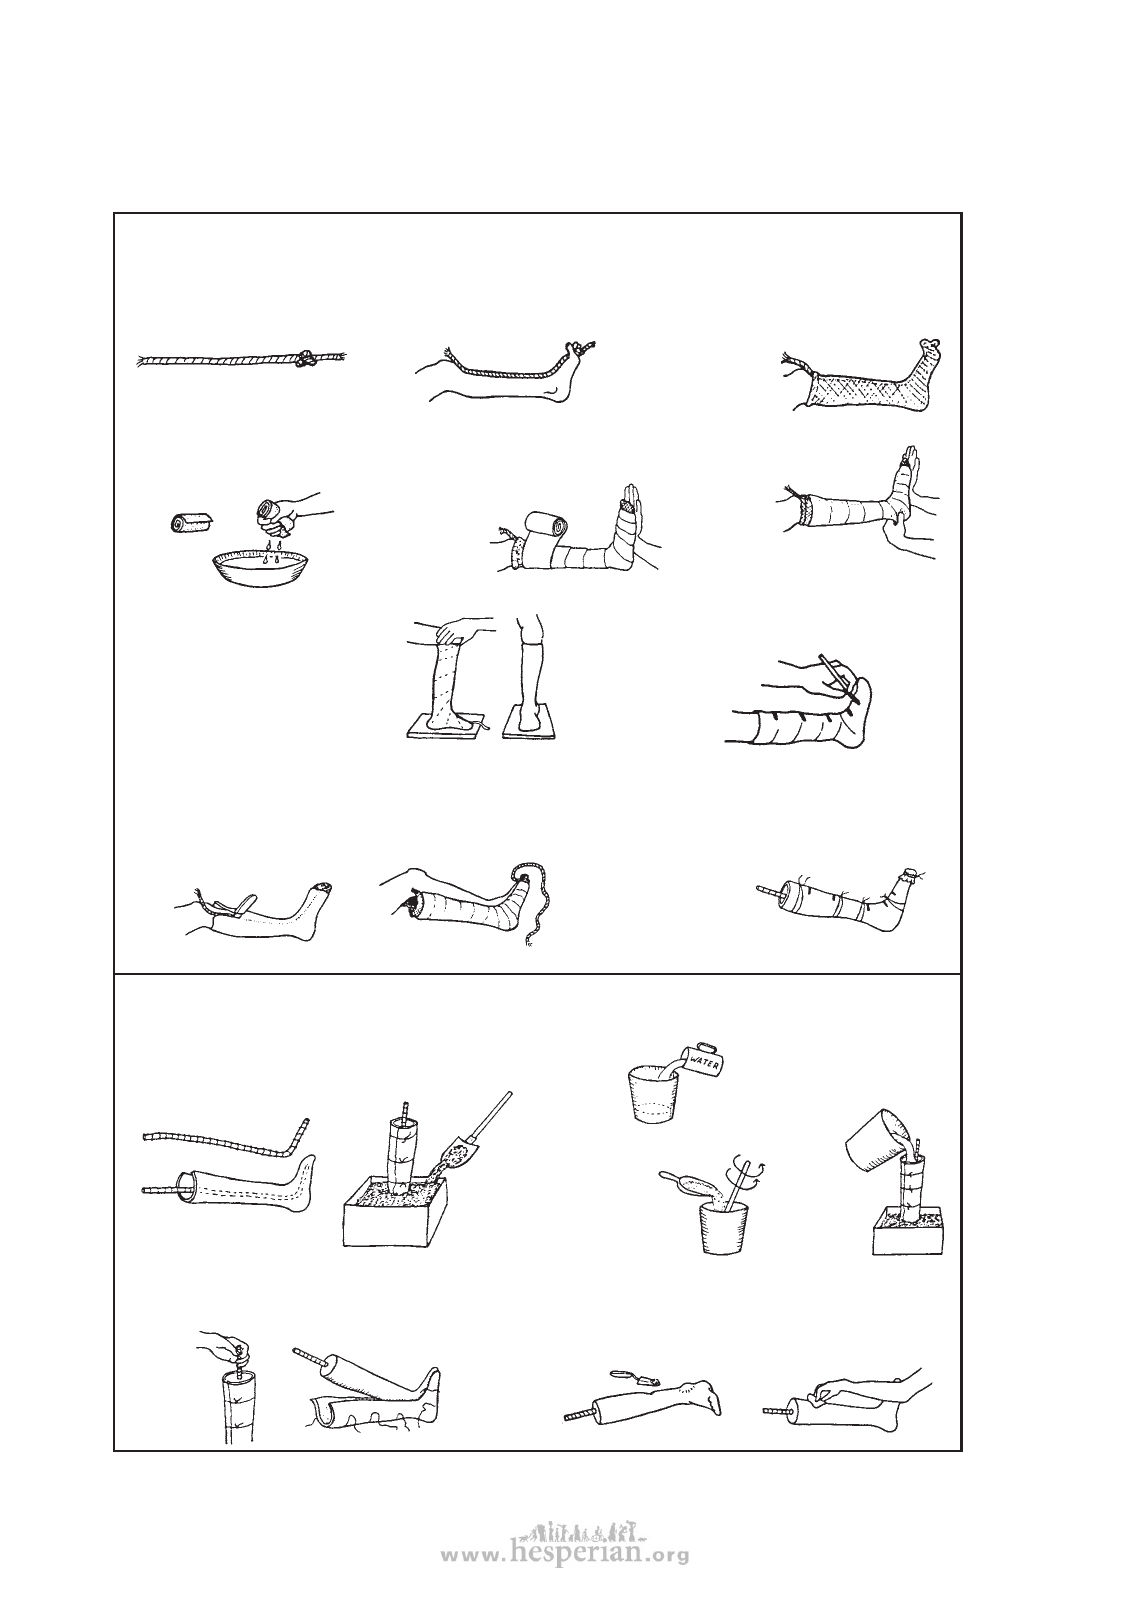
Making the plastic-bucket brace consists of 3 main steps:
A. Making a hollow plaster
cast of the child’s leg
B. Making a solid plaster
mold of the leg
C. Heat-molding the
plastic-bucket brace
A. Making the hollow cast
1. Tie a knot in the end
of a soft rope.
2. Put the rope on top
of the leg with the knot
between the toes.
4. Wet a plaster bandage
and squeeze out the extra
water.
5. Wrap on a thin cast (about 3
layers) while someone else holds
the foot in a good position.
Be sure the heel
is covered
with several
layers.
3. Put the stocking tightly on the
foot with the rope inside (or wrap
it with a thin cloth).
Avoid wrinkles.
Make sure the
rope stays
very straight.
6. While the plaster
is still wet, smooth it
gently with
moist hands,
and press the
cast gently
into all the hollows of the foot.
7. Before the plaster becomes firm,
place the foot in exactly the position
that you want the brace to hold it in.
Sometimes it works well to hold the
foot in your hands. But often it works
best to have the child step firmly on
the floor, or on a padded board.
Be sure to
position the
leg straight
up, from side
view and
front view.
8. Draw some lines over
the front of the cast.
9. When the cast is almost
firm but still damp (usually
in 5 to 10 minutes), carefully
cut through the plaster over
the rope. Take care not to
cut the child.
10. Then gently remove
the cast without
changing its shape.
11. Quickly (before
it is fully hard)
close the cast,
line up the lines
you drew, and tie
it shut with cloth
or string.
12. Tie a cloth
tightly over the
opening of the
toes.
B. Making the solid plaster mold
1. Put a bent piece
of rod into the
hollow cast.
2. Hold the cast in a
standing position—
perhaps in a box of
sand.
3. Mix the plaster:
Put water in
a container,
enough to
fill the cast.
While stirring, sprinkle
dry plaster into the water
Keep adding until
the mix is just
thick enough that
wrinkles stay a
moment on the surface.
5. Hold the rod
in the middle
until the
plaster
is
firm.
6. After plaster
hardens fully (about
one hour) remove the
solid mold.
7. Being careful not to change the
shape or size of the mold, use
fresh plaster to fill in any holes
or pits that are not caused by the
shape of the foot. Add a little
fresh plaster
over bony places
(so final brace
will not rub).
2. Quickly pour the mix
into the cast. Jiggle
the rod and tap the
cast to be sure the
mix fills all
spaces.
8. Smooth the surface
(with a file, piece of
wire screen, or piece
of broken glass). Do
not reduce any of the
bumps caused by the
bones.
Disabled village Children