BRACES (CALIPERS)
How to make plastic braces
Here we describe 2 methods for making molded plastic braces:
The first method uses old plastic buckets or containers, and needs less equipment.
Unfortunately, these braces tend to break easily when used for walking. However, they
make excellent, low-cost night braces (to wear while sleeping).
The second method uses sheets of polypropylene plastic. Additional equipment
(such as a vacuum sweeper) is needed, and it is a little more expensive. However,
the result is a high-quality brace that can last for months or sometimes years.
Method 1: Plastic bucket braces
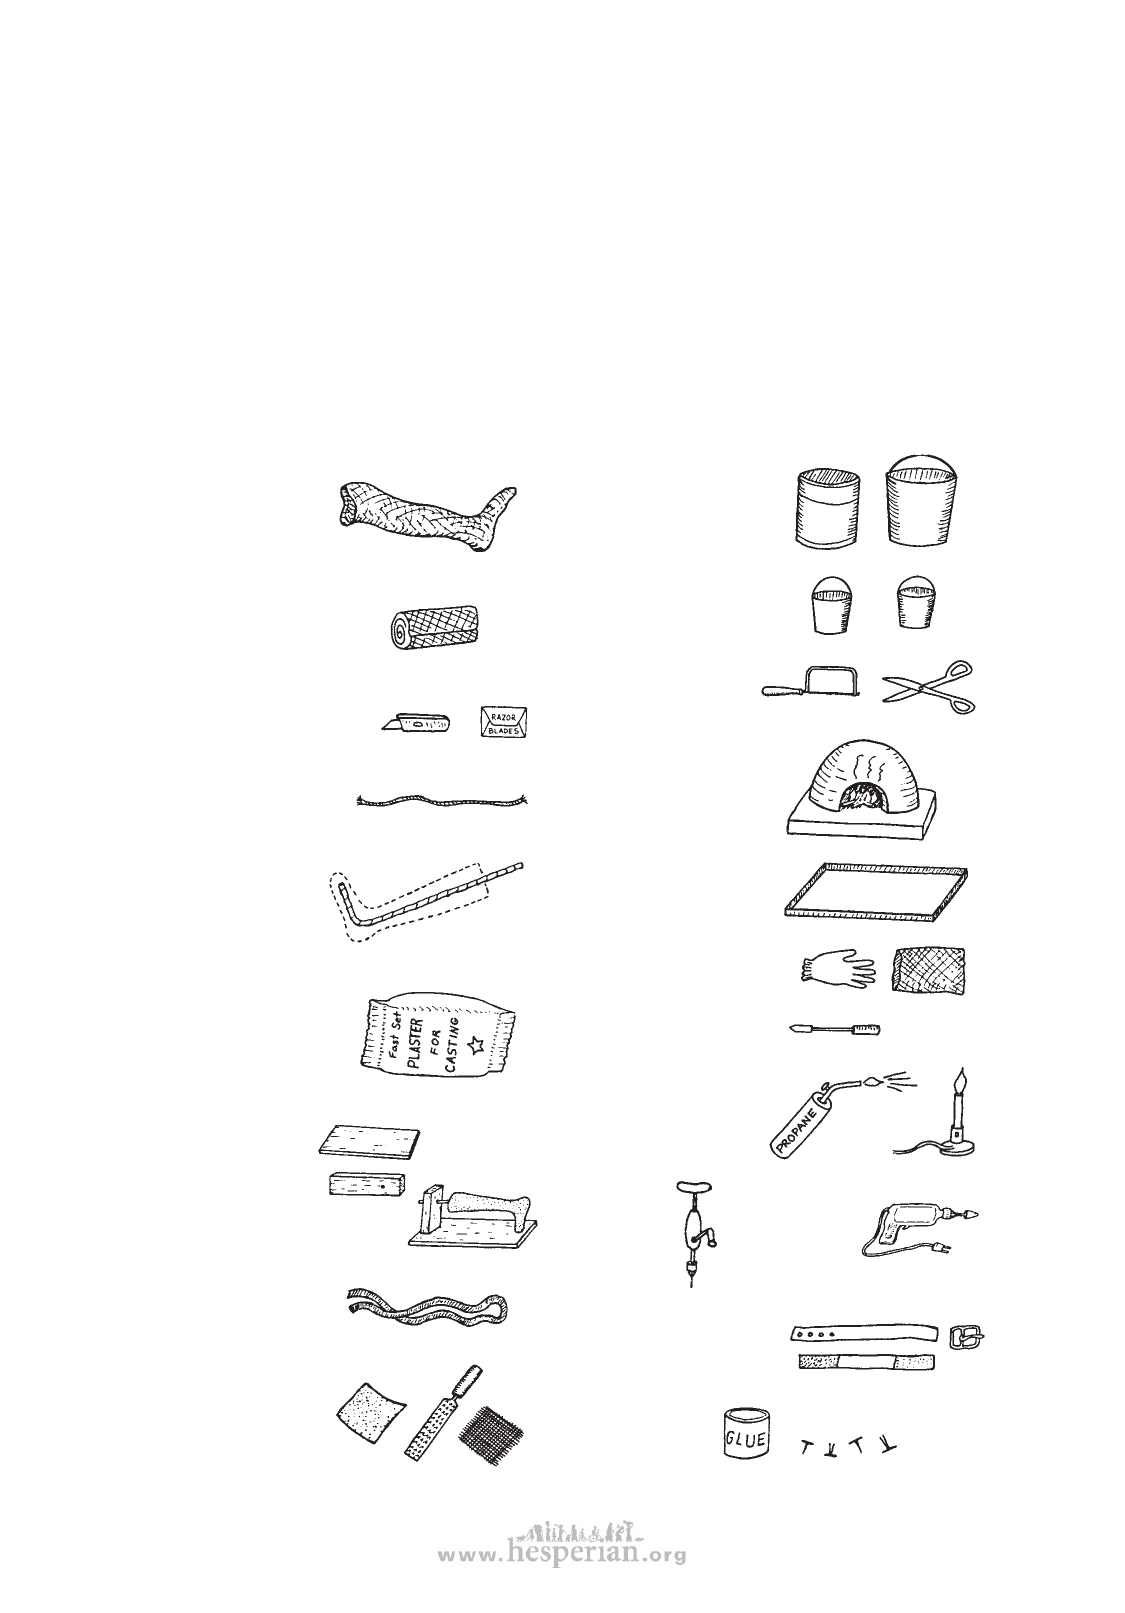
Equipment and materials needed:
551
• ‘stockinette’,
old stocking or
thin cloth strips
(for wrapping leg
before casting)
• plaster bandage rolls
for plaster casts. (To
reduce costs, roll your
own. See p. 569.)
• a sharp knife or
single-edged
razor blade
• a piece of soft rope
about ½ meter long
• large plastic bucket
or containers to be
cut up. Plastic should
be at least 2.5 mm.
thick and of flexible
(not brittle) plastic
• other buckets or water
containers
• saw or strong
scissors for cutting
plastic
• an oven (wood, gas,
or electric)
• a piece of old
reinforcing
rod, pipe, or
iron, bent to fit
inside the foot
cast
• fast-setting
building plaster
for the solid
plaster mold
• 2 pieces of
wood nailed
together to
form a rack to
hold cast in this
position
• large metal cooking
tray or sheet of metal
• thick gloves or
potholders
• small soldering iron
• if possible, a gas
burner, torch, or ‘heat
gun’ to ‘spot heat’ the
plastic. (Note: A hair
dryer does not give
enough heat.)
• drill
and bits
hand or
electric
• several long rubber
strips cut from car
tire tubes
• tools for smoothing
plaster and plastic:
file or rasp, piece
of broken glass,
piece of wire
screen
• strap and buckle or
Velcro (plastic straps,
one with barbs and the
other with hairs so that
they stick to each other)
• glue or rivets
or both
disabled village children