BRACES (CALIPERS)
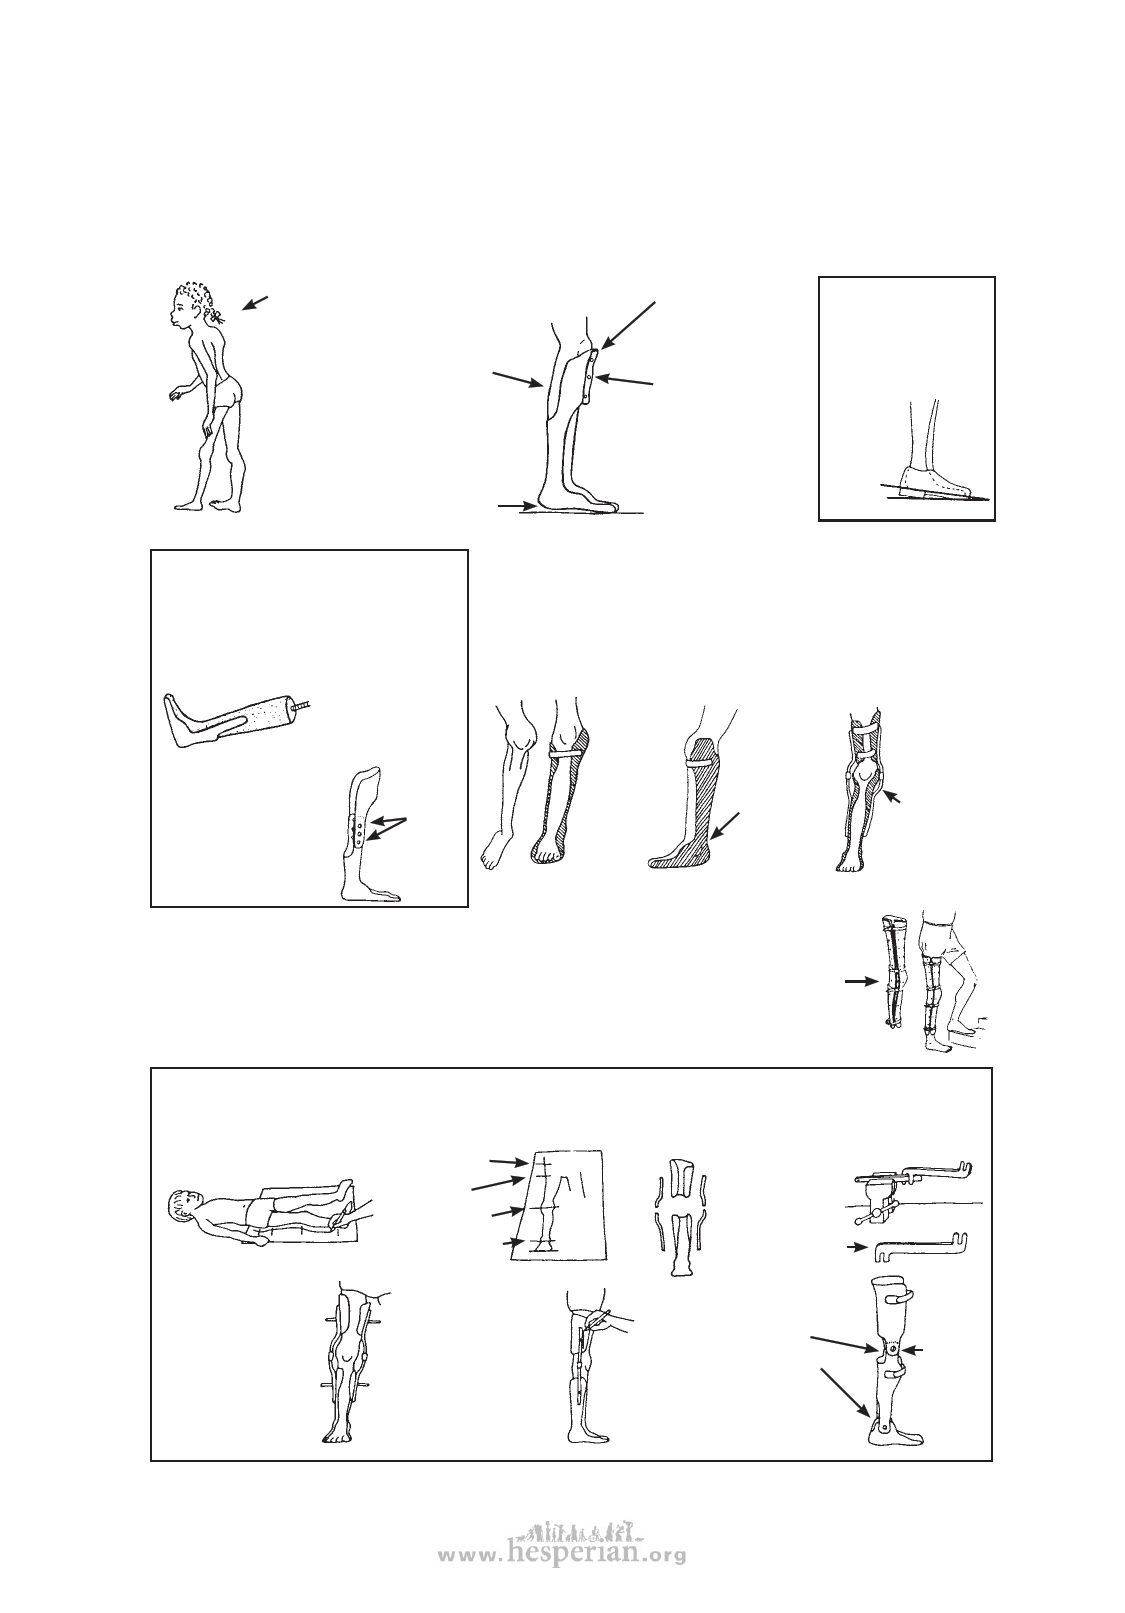
Different plastic brace models for different needs
In various places in this book we have shown different brace models and how
they meet the particular needs of a child. See, for example, p. 66 to 73 and p. 116.
Here are a few more ideas for different plastic braces:
Below-knee brace that gives knee support
The child with a weak upper leg
whose knee cannot support her
full weight, may be helped
enough by a brace that
pushes her knee back.
A strong stiff ankle on
the brace, with the foot
tilted down slightly (more
than 90°), pushes the
knee back when she steps.
Front of brace
presses against
knee.
The simplest way
to make this
brace is to rivet
the seam where
the plastic joins
in front. (See
photo, p. 550.)
CAUTION: The shoe
or sandal may
affect the angle
of the foot.
Allow for this
when deciding
the angle
for the
foot of the
brace.
557
A similar brace can be made in
2 parts.
1. Make the lower part, and place it
back on the plaster mold.
2. Place the mold
like this and form
the top part of the
brace over the
lower part.
When the child grows,
this brace can be
made longer by
removing the rivets
and separating the 2
ends more.
rivets
Side-support knee brace
A brace that supports the knee may help a child
that has a sideway bend or partial dislocation of
the knee.
Make the
brace
higher on
the side
that
needs
more
support.
Also, make
the brace
higher on
the side
of the
ankle
that needs
more
support.
Also, in an
above-knee
brace, you
can put extra
support on
the side of
the knee that
needs it.
Above-knee plastic braces
The simplest kind of above-knee plastic brace is a single piece without a knee
hinge. You can make it in the same way as a below-knee brace, with or without a
footpiece. These braces are useful on small children.
To make a jointed above-knee brace:
1. Draw the shape of the
child’s leg on paper.
1. Mark the height of the
hip bone
crotch
mid-knee
ankle bone
4. Temporarily
pin or bolt the
plastic pieces to
the metal pieces.
Then you can
adjust the front-
to-back angles
with the brace on
the child.
5. When the angles
are right, mark
the position, and
after checking
all aspects of fit,
rivet the pieces
together and add
straps and knee
supports.
3. After forming the plastic pieces on
plaster molds, bend metal joint pieces
so they fit the shape of the leg.
To bend the flat
bar, make or buy a
bending iron.
steel bending iron
Hinged braces can also
be made using the plastic
itself for knee hinges,
and even ankle hinges.
However, these hinges
may not last long with
heavy use.
rivet
disabled village children