44 chapter 5
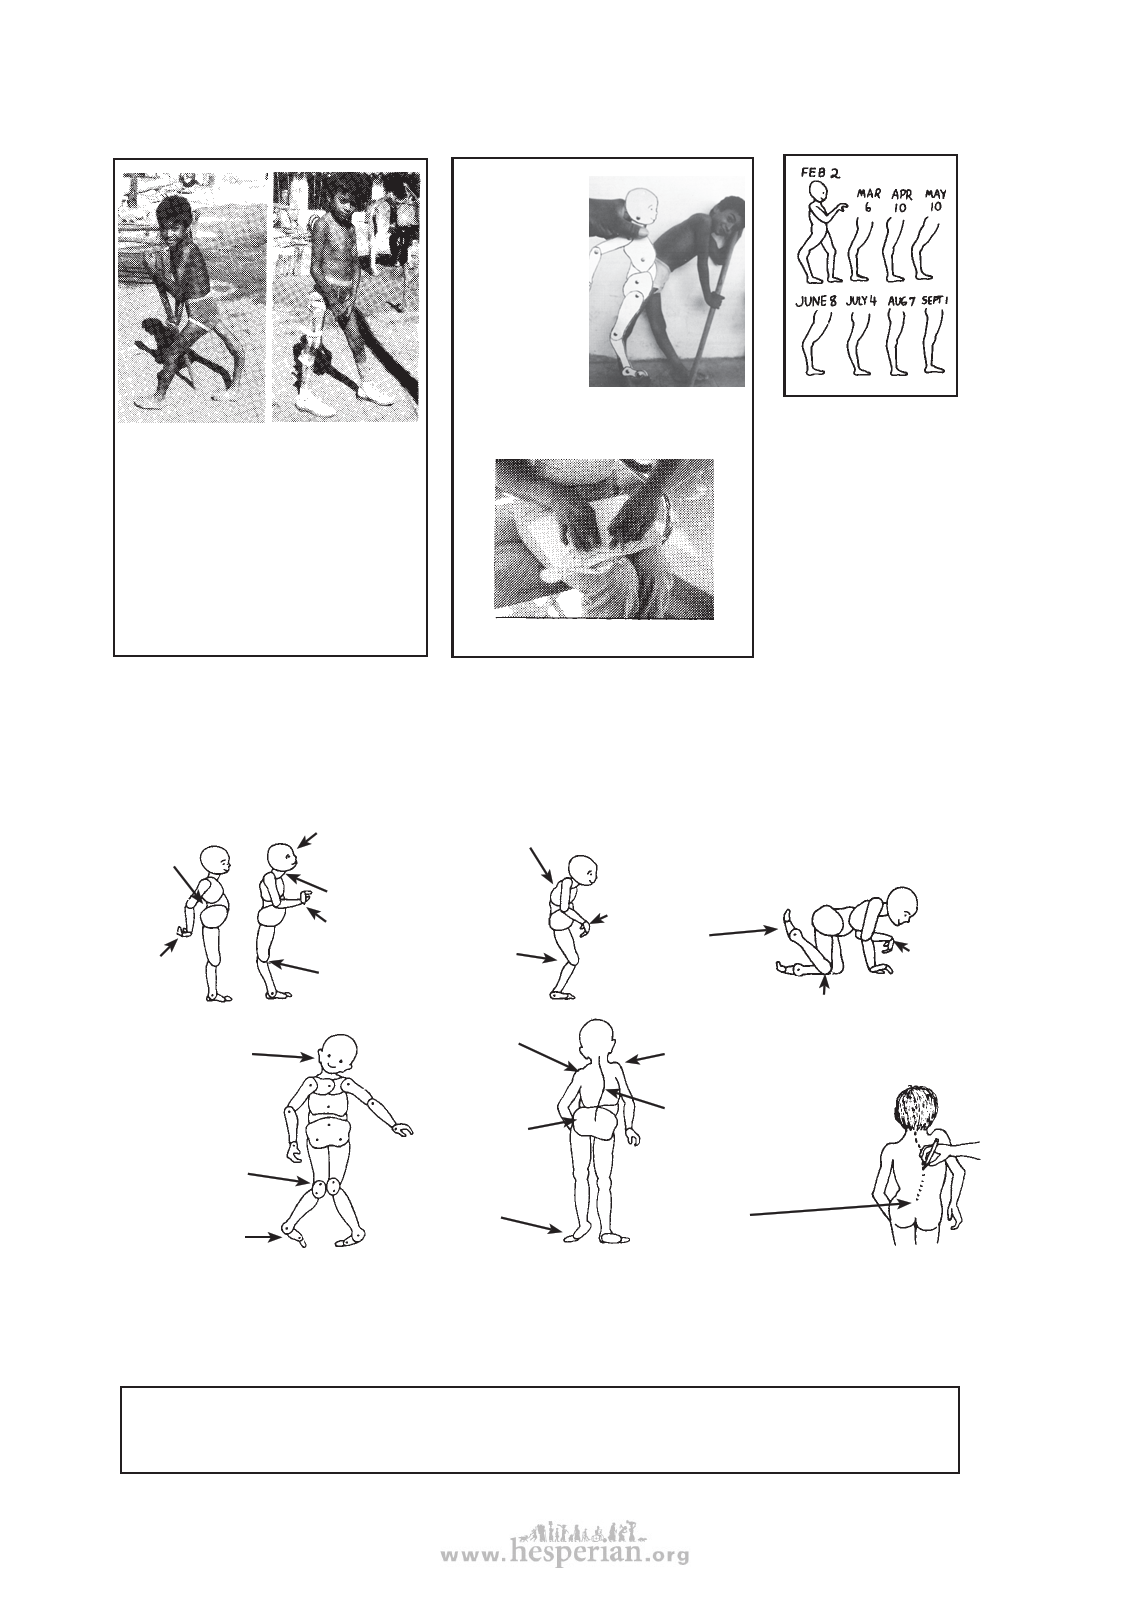
Examples of how flexikins are used
The mother
places the
flexikin’s leg
in the same
position as her
son’s leg, bent
back as far as it
goes.
She then traces
it onto a large
sheet of paper.
Village rehabilitation workers have just
made a brace for a child with polio
whose leg bends back severely. They
want to know if the leg will gradually
get better (bend back less). So they
ask the mother to measure it every
month.
Each month she does
the same and records
the date. (In April her
son did not use the
brace for 2 weeks
and she saw the knee
was getting worse.
This convinced both
mother and boy of the
importance of using the
brace.)
The flexikins can be used to record a wide variety of positions, deformities, contractures,
and limitations in range of motion, mainly of the arms and legs but also of the neck, back,
hips, and body:
swayback
hand
very
bent
head to
one side
knees together and
feet separated
feet turned inward
head leans
backward
neck forward
hand bent up
knees bent
backward
hunch-backed
You can draw both
arms and legs. First
one and then the
other, like this:
knees
bent
forward
trunk
twisted
fallen
hand
feet
contracted
(twisted)
downward
knee
contracted
this shoulder higher
than the other
hip tilts to
one side
‘tiptoe’
contracture
spine curved
(Draw the spine by
looking at the child
after you have marked
each vertebra with a
marker.)
elbow
and hand
contracted
In addition to using the small flexikins for record keeping, you can make large flexikins for
group teaching. Or use them to keep body proportions correct when making drawings for
instruction sheets.
Note: For recording contractures, we have found the side-view flexikin more useful than
the front-view one. The side-view flexikin is also easier to make. It is probably the only
one you will need for evaluating a child’s progress.
Disabled village Children