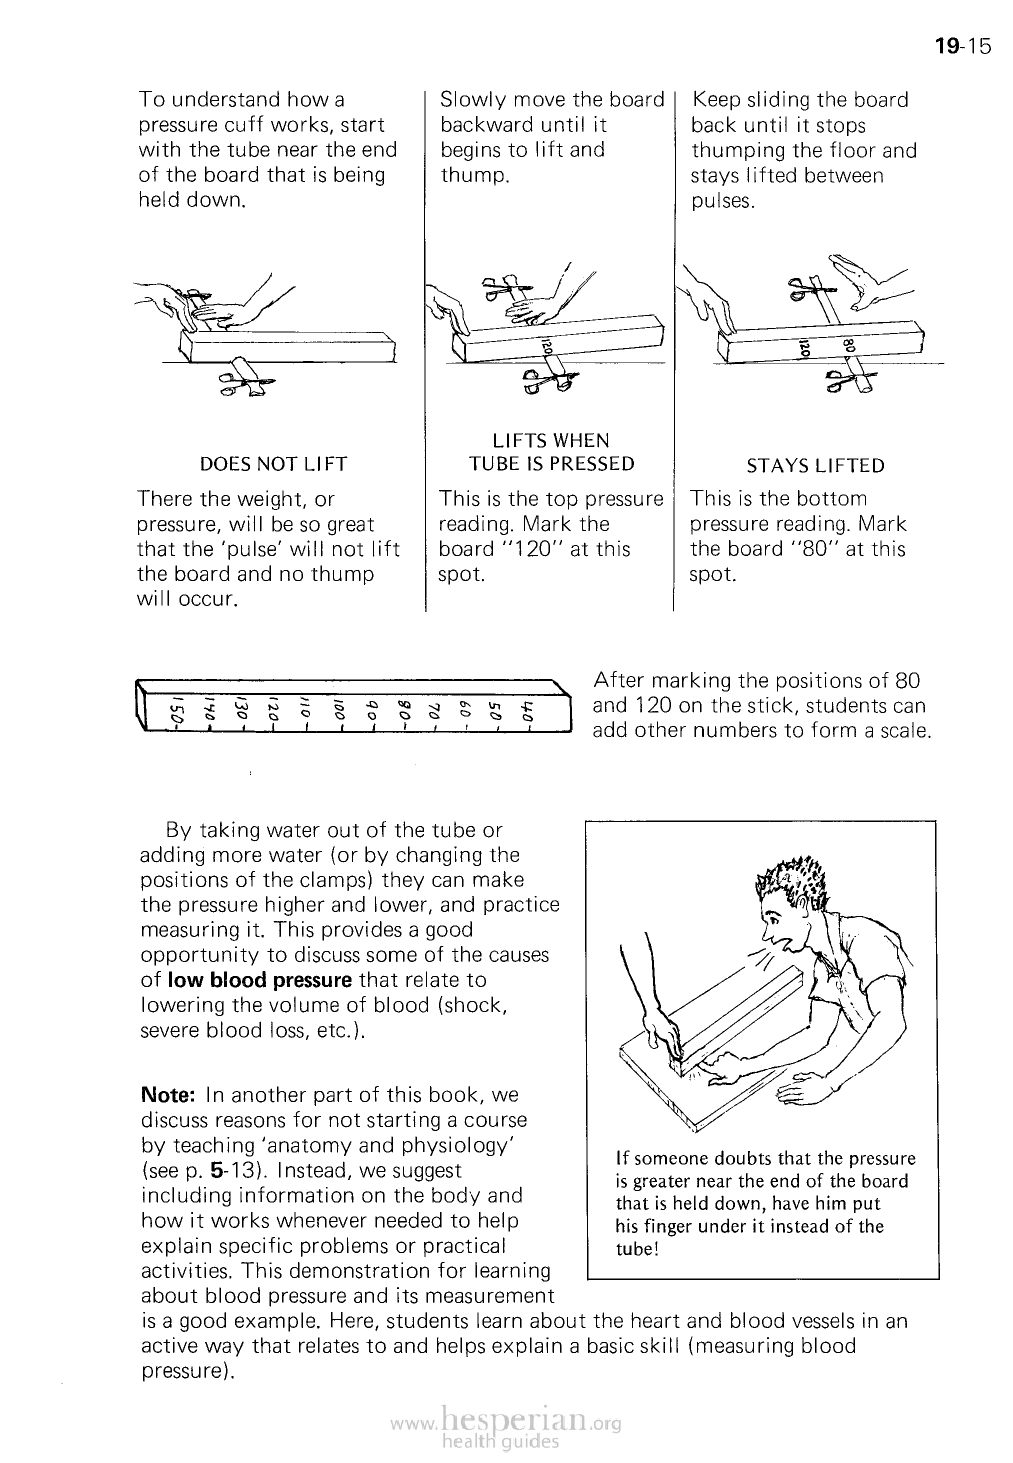
To understand how a
pressure cuff works, start
with the tube near the end
of the board that is being
held down.
Slowly move the
board backward until
it begins to lift and
thump.
19-15
Keep sliding the board
back until it stops
thumping the floor and
stays lifted between
pulses.
DOES NOT LIFT
There the weight, or
pressure, will be so great
that the ‘pulse’ will not lift
the board and no thump
will occur.
LIFTS WHEN
TUBE IS PRESSED
This is the top pressure
reading. Mark the
board “120” at this
spot.
STAYS LIFTED
This is the bottom
pressure reading. Mark
the board “80” at this
spot.
After marking the positions of 80
and 120 on the stick, students can
add other numbers to form a scale.
By taking water out of the tube or adding
more water (or by changing the positions of the
clamps) they can make the pressure higher and
lower, and practice measuring it. This provides
a good opportunity to discuss some of the
causes of low blood pressure that relate to
lowering the volume of blood (shock, severe
blood loss, etc.).
Note: In another part of this book, we discuss
reasons for noi starting a course by teaching
‘anatomy and physiology’ (see p. 5-13).
Instead, we suggest including information on
the body and how it works whenever needed
to help explain specific problems or practical
activities. This demonstration for learning
about blood pressure and its measurement is a
If someone doubts that the
pressure is greater near the end
of the board that is held down,
have him put his finger under it
instead of the tube!
good example. Here, students learn about the
heart and blood vessels in an active way that relates to and helps explain a basic skill
(measuring blood pressure).